The Bard's Tale IV - The Director's Cut
Review
“The song I sing will tell the tale of a cold and wintery day. Of castle walls, and torch lit halls, and a price men had to pay. Where evil fled, and brave men bled, the dark one came to stay. Til men of old, for blood and gold, had rescued Skara Brae”.
Upon starting a new game you’ll be offered the choice of one of four Combat Styles (game difficulty). These are Nursery Rhyme (Easy), Tavern Song (Normal), Heroic Ballad (Hard) and Dead Man’s Tale (Legendary). You can also tweak each of these difficulties by selecting On/Off for Save Anywhere, Auto-Resurrect, Perma-Death and Show Enemies On Map. To help you decide, there is also some information on each of the game's difficulties at the bottom of the screen.
Once you’ve decided on the game’s difficulty, you’ll have the option of three Exploration Styles to choose from: 80’s Style, As Designed and Skippable Puzzles. You can also tweak the exploration style, Control Scheme (Gamepad or Mouse & Keyboard), Movement Mode (Free or Grid Mode). There are also options to turn On/Off settings for Skippable Puzzles, Auto-Mapping, Mini-Map (also Hud Only option) and Show Waypoints. You can also find some information on the bottom of the screen for each of these options. After completing your game preferences and hitting the confirm button will start your game.
A small intro plays before entering the game. Sitting in front of a nice ‘n cozy fire, a bard sings about the deeds of those who rescued Skara Brae. After the intro you’ll find yourself in Skara Brae; it’s not the most pleasant thing you’ll see upon entering Skara Brae. Ropes dangle down from the branches of a huge barren tree (Henred’s hanging tree), and at the other end several poor souls are wearing a noose for a scarf. As they wait for the trapdoor to open, a voice preaches that it’s the elves, dwarves, practitioners of magic, trows and bards who are killing the people of Skara Brae. The Fatherites, a religious group, are convinced that the spate of killings of late is being carried out by these ungodly folks. It’s because of the hate the Fatherites have for the other races that they are hanging these poor souls today, whose only crime was living.
You play as Melody (you can choose to customise your own character if you wish), a bard, and after witnessing the hangings you make your way to speak with Rabbie. Rabbie is another bard and the leader of the Adventurer’s Guild who tells you to forget about revenge, as you’ll only get yourself killed. However, he goes on to say that you will save Skara Brae; he has seen it in his dreams for the past seven nights. He also says that while you become the hero, you leave him to be buried alive when you could have saved him. He hopes that his dreams are true about you becoming a hero of Skara Brae, although he also really hopes that he can skip the dying part. For now, though, Rabbie will just have to trust that you will do the right thing later. He suggests that they head back to the Adventurers’ Guild, where he will speak to the rest of the guild members.
Rabbie now joins your party for the time being. You can have a total of three party members to join you on your adventure; for now though it’s just you and Rabbie. As Rabbie joins, you will then be able to confirm his membership in your party and you will also be able to disable the tutorial if you wish. The tutorial will pop up when and where required to help explain things as you progress through the game. As you make your way to the adventurers’ guild, you’ll need to be careful of paladins, the Fatherite’s muscle. Anyone who isn’t a Fatherite is being rounded up for judgement. Upon reaching the guild, Rabbie talks with elves, dwarves and trow about this being the last straw and that something must be done.
The guild, normally a safe place for all folk, is attacked by paladins who order everyone to be arrested and burn down the guild. You escape through a secret passage that leads to the old town which lies buried below the new town of Skara Brae. Here you head towards the old adventurers’ guild, which may be a bit dirtier than the guild above ground, but it’s hidden. Here there will be no visit from the Fatherites and the paladins, so all those who seek refuge are safe. From here you set off on your adventure to rescue Skara Brae, something which I couldn’t wait to do after listening to Rabbie singing.
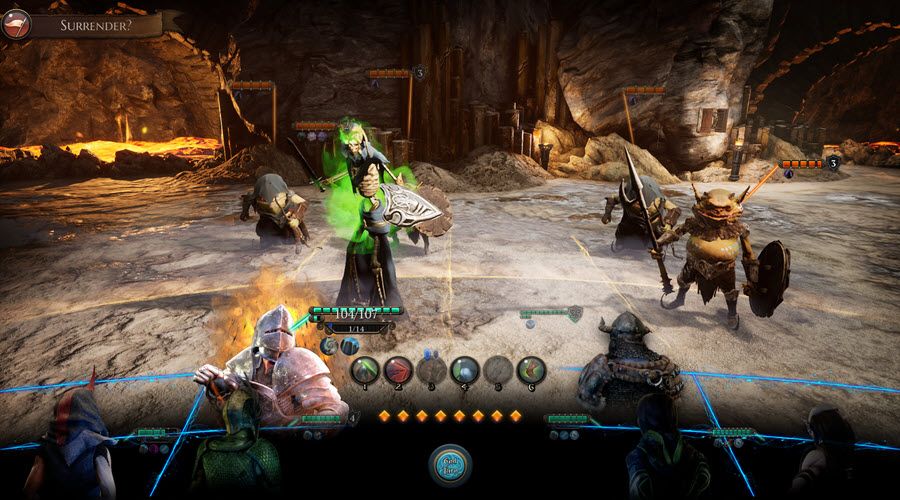
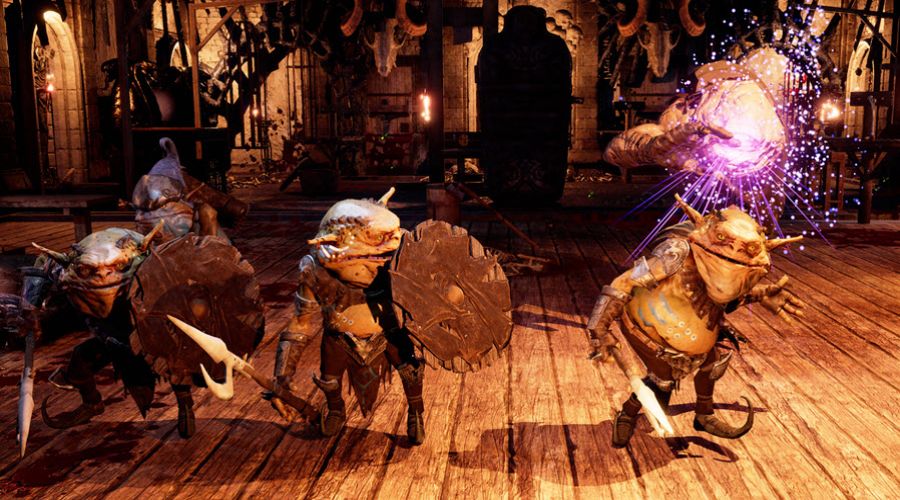
As you progress through the lands, you’ll come across enemies such as paladins, goblins, cult members and many others which you must defeat if you’re to survive. You’re not going to be able to attack all enemies and sometimes you’ll need to find a way past or around them. To judge if you have any chance of defeating an enemy, you can move your cursor over them, and it they will be highlighted in one of four colours. These colours indicate if you have any chance of defeating this enemy: Green (Easy enemies), Yellow (Even enemies), Orange (Challenging enemies) and Red (Impossible enemies).
If you can’t get by an enemy or you think, “I can spank their botty,” you can move towards an enemy. You really want to get the first attack in, so to do this you highlight one of the enemies then move towards them until the Charge icon appears. If you’re successful in charging an enemy, you’ll be granted First Strike! For the first move in battle, if the enemy spots you before you can charge them, you’ll be Spotted, giving the enemy first move instead. If you don’t want to be spotted, then be careful as they can spot you from a distance. I tried watching from around a corner with only a slither of view, when this cultist mage passed; the git spotted me and then spanked me botty!
The battles are turn-based and set upon a gridboard of four rows and four columns (two rows and four columns for your party and the enemy’s party). To start with you have three Opportunity Points to spend each turn, between any of the party. As you progress, you’ll gain more opportunity points to use each turn. These points can be used to activate abilities of your party members in battles. Any party member who loses all their health in battle isn’t killed, but just incapacitated. If the rest of the party manages to defeat all the enemies, then the incapacitated members will be revived with twenty-five percent of their health. Obtaining a victory will display all the defeated enemies and give you experience points for each one.
Not all abilities use opportunity points; some use Spell Points, and a bard can use various alcoholic drinks, like elven wine or other drinks to gain spell points. However, if your bard drinks too much, as with any of us, they’ll end up (Piston) Smashed! If their drunkenness level exceeds their intelligence, then they’ll pass out and be stunned for one turn, although before this happens, they’ll have a brief burst of strength. I had a drink each time my bard did, and I passed out after half a bottle of Jack Daniels Honey; sadly it wasn’t for one turn but for about five hours.
As your party members level up, they’ll earn Skill Points, which can be used to unlock new abilities in your Skill Tree. The class of a member will determine which new abilities they can learn. Each class will have the basic Attack and Defense skills, along with others that depend on their class. As a bard you’ll have Music and Brewing skill abilities which you can unlock.
You can select any new ability from within the inventory from the Mastery Book. Here you’ll find all the abilities that you currently have; you can select up to four to use in battle. You can also reset your abilities by visiting the Review Board and using a Mercenary Token. Doing so will refund any skills points used so far, resetting your skill tree, and allowing you to use those refunded points for selecting different abilities. Visiting the Review Board will also allow you to learn certain skills or to follow certain paths. These are only available to you after you have proven yourself worthy by completing certain quests.
As you make your way around places you visit, you’ll be able to find items, weapons, armour, chests, barrels, boxes and maybe some hidden secrets. Many items you collect can be used for crafting new items such as booze, health potions, meals, lock picks and many other things. You can craft new items at any time, from anywhere, if you have the correct crafting items, just by going to your inventory and selecting the Craft button.
You will also find Luck Stones here and there; at these stones you can save your progress. Should all your party become incapacitated you’ll end up back at the last luck stone you saved at. Celestial Offering altars - here you can make an offering and be rewarded with powerful items. To receive these rewards, you will need to offer the correct items. These can be found by examining the altar’s Celestial Code (constellations) and then using the Celestial Code Wheel to determine the code numbers. Once you have the code numbers you can then check the Adventurer’s Celestial Almanac to find which items are required for the offering.
There are other things you should keep an eye out for, such as signs where hidden stashes of resources can be found near-by. Walls (sausages) with hidden passages behind them. These can be found by playing the right Songs of Exploration. Songs such as Wildland Whistle will indicate you’re a trusted adventurer, Hidey-Bide will reveal hidden trow stashes when activated near a trow’s secret sign. Gaufain’s Hammer will allow you to knock down certain walls (sausages), revealing hidden rooms, passages or chests. You will also come across some puzzles, some of which are easy while others not.
You can play the game in two modes, Grid or Free; I personally preferred the Free mode using mouse and keyboard for moving around freely. You can though-play using the Grid mode, where you’ll move as though you’re on a grid - move forward, turn, move forward again etcetera.
In the options you’ll find settings for Graphics - Display Settings (Language, Window Mode, Resolution, Resolution Downscale, V-Sync, Field of View, Gamma Correction/Calibrate and Sharpness). Overall (Quality Low to Ultra, Auto-Detect). Quality Settings (Remove Texture Limits, Texture Quality, Effects, Modes, Foliage, Shadow Resolution, View Distance). Post Processing (Anti-Aliasing, Ambient Occlusion, Depth of Field, Motion Blur, God Rays and Water Reflection).
Sound – Volume Settings (Master, Sound FX, Ambient Sound, UI, Music and VO volume sliders), Sound Settings (Speaker Mode, Show Subtitles, Show Combat Subtitles and Party Chatter), Gameplay Settings – Camera Sensitivity slider and Invert Y checkbox, Controls – Keybinds (Free Move, Grid Move, Exploration Controls and Combat Controls). You have the option of two sets of pre-bound keys based around WASD and the Arrow keys, but you can remap any of the keys to your own preference.
The first time I started up the game it made me feel a bit queasy, however after changing the field of view to seventy-five percent I never had the problem again. I have enjoyed my time playing the game so far, loved some of the dialog. I’ve been online for over twenty years; thought I’d been called everything under the sun until I was called a Gnome Licker!
Review written by Piston Smashed™ for Zeepond.com!
Positives
+ Good story, quite funny dialogue+ Decent graphics
+ Good music (although Rabbie’s sing is a lot to be desired)
+ Achievements
+ Cards
Negatives
- Made me feel sick at first, changing FOV sorted that out thoughReview Summary
Uncover the evil spreading through the streets of Skara Brae and rescue those persecuted by the Fatherites.
Share this review!
Zeepond Rating: 8/10

Video
Game Categories
All Game Reviews (1352)Hardware Reviews (0)
Action (341)
Adventure (151)
Alpha Games (2)
Anime (5)
Board Games (3)
Casual (135)
First Person (19)
First Person Shooter (30)
Hardware (0)
Horror (38)
Massive Multiplayer Online (4)
Pixel Graphics (22)
Platformer (94)
Puzzles (64)
Racing (26)
Role Playing Game (61)
Simulation (53)
Sports (20)
Strategy (246)
Third Person (11)
Utility software (1)
Virtual Reality (22)