Stoneshard
Review
To begin with, you play as Verren, and you wake up shackled in leg irons in some dingy dungeon. As you’re surveying your surroundings the guard announces that you’ve woken up just in time for the ritual and that they’ll need you soon! The guard tells you not to try anything funny otherwise you’ll end up like one of his friends (which doesn’t sound like too much fun, as your friend is being drained of his blood). With that, the guard disappears to check on your friend, making sure that every drop of blood has been rung out of him.
This is your chance to break out of this bloody dungeon cell, and it’s also a good time to pay attention to the tutorial instructions. Noticing that your shackles are rusty, you break free of them, but you’re still locked in a cell. However, luckily for you, Locke is in your cell with you (not so lucky for Locke though, as he’s sadly snuffed it). The guards didn’t search the poor guy, which can only benefit you as you take his items, bread, waterskin (filled with water), and most importantly a set of lockpicks.
Using the lockpicks to open your cell and escape, you find a pipe on the floor which you can use as a weapon for now. There are multiple cells, although it seems that you’re the only one left down here. Barrels and boxes, all of which may contain something of value, are scattered around. The exit to this part of the dungeon is barred by the guard you met earlier; disposing of him will allow you to proceed.
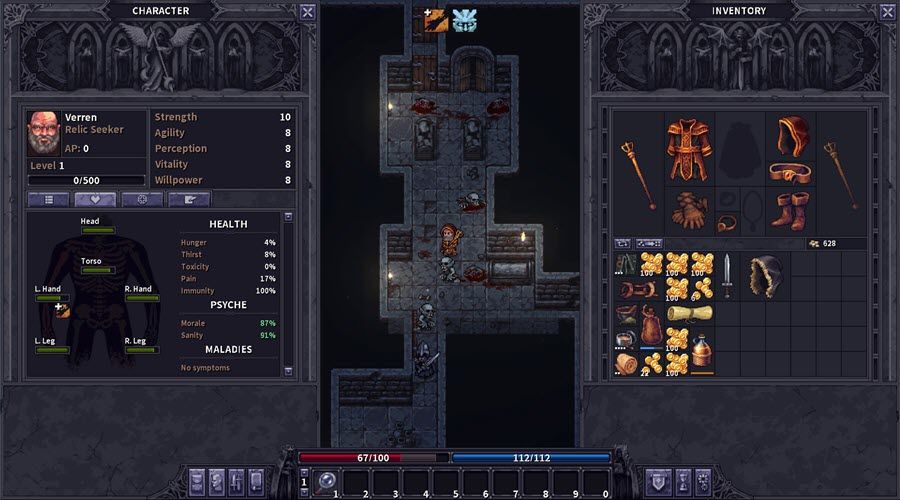
You will have some help with tutorial tips going over the basics as you make your way through the first few places in the dungeon. The current objective is displayed in the top left-hand corner of the screen. On the bottom of the screen on the left side is a log of the actions you’ve completed, such as Use a Splint, Use a Healing Salve, Opens a Door etcetera. Along the centre bottom of the screen is your Inventory, as well as a Character Panel, Skills, Journal, Modes, Skip Turn and Game Menu. These are spilt either side of your Quick Menu Buttons and above those are your Health and Energy. In the top centre of the screen is where you’ll find your character’s current State, Conditions, and Physical status, such as Hunger, Immobilisation, Dehydration, Optimism, Injuries etcetera.
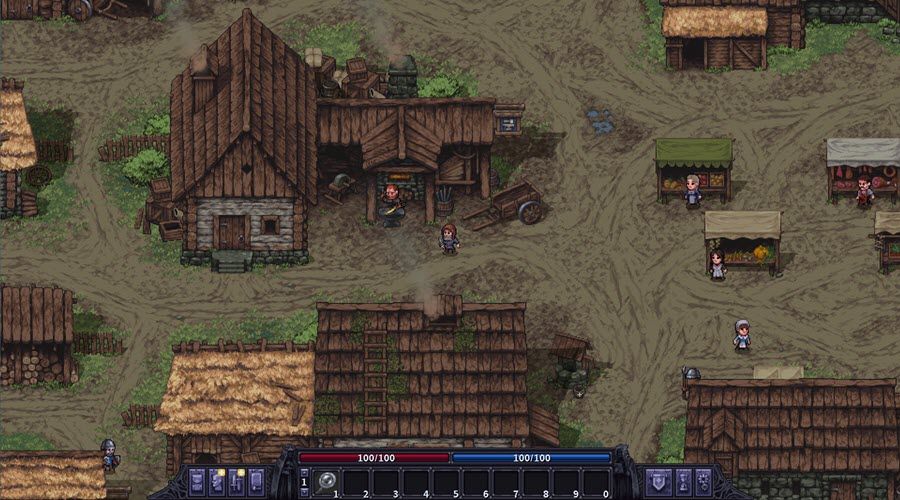
To move, you place the cursor in the position you want to move to and left click; this will lay down some dots, making a path to where you want to go, and your character will move there. Your character will move swiftly, one step at a time, as though you’re on a grid and moving from one square to another. However, if you are spotted within a certain range by an enemy, you will only be able to move one step at a time, as will the enemy.
This is the combat phase, where the enemy or enemies make their way towards you. You and the enemy will take turns in taking one action each, which could be to move, use skills or magic, or attack with your weapons. You can also Inspect your enemies to discover some information about them. The information will give you details on Type of Enemy, Health, Energy, Resistances, as well as some general details about them. Enemies can be just as tough or even tougher than you are, so avoid going head to head with them if possible. Using your surroundings may help you defeat them without taking too much damage. One time I kept running around a table and attacking with my pyro abilities and my bow and arrow rather than getting up close and personal using my melee weapons and taking damage.
When you take damage, you don’t just lose health, you could also suffer serious injuries to your Body: Head, Torso, Left and Right Hand and Left and Right Leg. If the condition of these body parts falls below a certain threshold, they’ll become injured. The more injured these body parts are, the more impact they’ll have on your character, lowering its Max Health. Pain will also influence your character’s wellbeing, the lower your health, the lower your character’s pain threshold will be. This means that healing will be less effective, and as your pain grows, it could kill you if you don’t take care. You can get rid of pain by using a variety of pain killers.
To heal your health, you can use Healing Salves and other remedies, although if you have injuries you will need to stabilise them. You can do this by applying splints, performing surgery or applying leeches. This will stop your pain level from increasing, but you will still have any negative effects of your injury. Once the injured body part is restored to a certain threshold, then it will completely heal. Bandages can be used to stop bleeding and you’ll need to keep an eye on your Hunger, Thirst and Intoxication as these can also have an impact on your health.
Health will restore itself over time, and if you switch from Attack Mode to Rest Mode, you’ll recover your health and energy faster. But there are restrictions as to when you can use Rest Mode. Additionally, you can’t perform any actions while in Rest Mode; no enemies must be within your vision, and taking damage or receiving a deadly debuff will cancel this mode. Hunger and Thirst will increase while you are resting, so you must take all these factors into account while you rest.
As you defeat enemies and complete quests, you’ll gain Experience Points and earn Attribute Points. You can use these Attribute Points to increase your character’s Strength, Agility, Perception, Vitality and Willpower. New Skills and Abilities can be learned, some of which will need to be unlocked before you can learn them. To unlock them, you must find the corresponding Treatise, which you will find scattered around as you progress.
You can have two sets of weapons and swap between them at any time. So you can have a melee set of weapons, like a sword and shield, and a bow and arrows as a ranged set of weapons. While in combat, though, should you which to switch between the two sets, it will cost you your action for a turn, so you might want to switch earlier rather than later.
You will find some equipment which isn’t identified and has unknown properties. You can still use it, but to find out what its properties are, you’ll have to use an Identification Scroll. Some unidentified items are Cursed and will have some negative effects on them. If you equip a cursed item, then you won’t be able to unequip that item, unless you use a Disenchantment Scroll. There is one more Scroll type, called the Enchantment Scroll; using this on your equipment will endow it with various benefits.
The game is in Early Access and there are some parts of the game not yet implemented, such as in the Journal. Currently you can only find Quests and Map in the Journal, which work. Reputation, Rumours and Bestiary will be sorted in future updates. So far the game has been enjoyable to play, although it is frustrating at times. I went to do a quest and failed a couple times, so I found myself back where I last saved. This isn’t too bad, except that you can only save at the Inn; again, not a problem unless you had not saved before heading off on a quest, and therefore had to redo everything that you had failed at.
Also make sure you have plenty of food and supplies. I tried taking the short route back to the village through the wilderness as I was starving; I had no food and it was touch and go as to whether I would make it to the village. I was only two sections away from the village when I moved into the next screen, only to step straight onto a snake, which bit me! Every time I moved, I lost a bit of health, but I pushed on thinking, “I’m almost there; only one more section to cross,” only to come across a pack of wolves. I found myself back at the Inn at my last save. Frustrating it can be, but enjoyable as well.
Review written by Piston Smashed™ for Zeepond.com!
Positives
+ Nice graphics+ Fun enjoyable game
+ Challenging
+ Open world
Negatives
- No achievements currently- No cards currently
Review Summary
As a medieval mercenary, complete contracts and quests in a war-torn kingdom!
Share this review!
Zeepond Rating: 8/10

Video
Game Categories
All Game Reviews (1351)Hardware Reviews (0)
Action (341)
Adventure (151)
Alpha Games (2)
Anime (5)
Board Games (3)
Casual (135)
First Person (19)
First Person Shooter (30)
Hardware (0)
Horror (38)
Massive Multiplayer Online (4)
Pixel Graphics (22)
Platformer (93)
Puzzles (64)
Racing (26)
Role Playing Game (61)
Simulation (53)
Sports (20)
Strategy (246)
Third Person (11)
Utility software (1)
Virtual Reality (22)