Bridge Constructor Portal
Review
Upon starting a new game you’ll be greeted by GlaDOS, who welcomes you to the Aperture Science Computer-Aided Enrichment Centre. GlaDOS explains that all applicants must complete the Test Series for Testing Series Tests, and that before you start, serious injuries may occur. In the event of a work fatality the Enrichment Centre will announce this to your family along, with no extra additional pay to your wages.
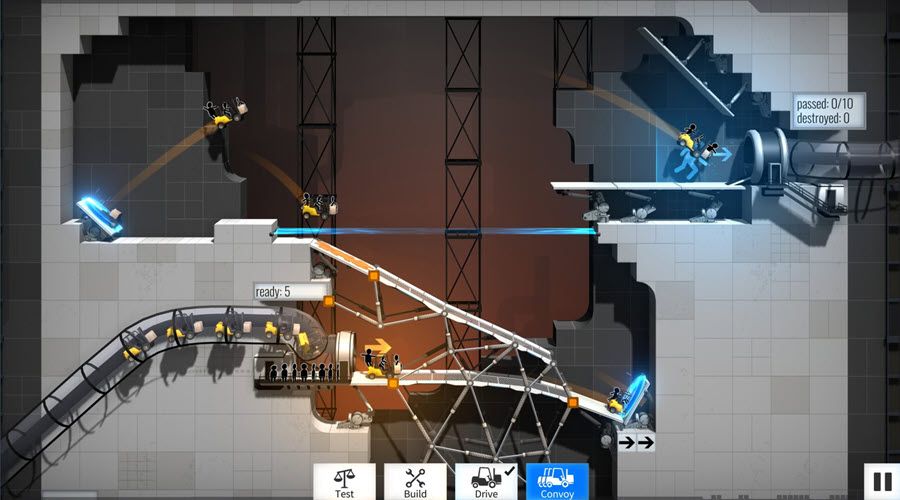
After being told you’re basically worthless, you find yourself on the first test level. On the left-hand side is where your test vehicles enter the level (indicated by the yellow area); over on the right-hand side is the exit for this level (indicated by the blue area). In between is a bad attempt at a bridge from your predecessor. On this level you’ll be shown how to remove the attempt of your predecessor; you will also need to build a bridge over the gap between each side. Below the gap is a couple of pillars protruding above some toxic substances, which isn’t going to go well if you happen to fall in.
The construction of the bridge will require you to use Aperture Science Scaffold Planks and other materials. You will attach these to certain construction points on the level, which are indicated as orange squares. Just attaching the scaffold planks to the construction points isn’t necessarily going to make your bridge stable. You will need to make sure your bridge is stable in order for your test subjects to reach the test chamber safely. So, in the case of the first level, you’ll be able to place a couple of scaffolds underneath the bridge for support.
Once you have finished your construction you will need to add a road to the exit, otherwise your test drivers will just plummet into oblivion. The scaffold planks you’ve used can be converted into a roadway; you do this by clicking on the scaffold plank that you want to use as a roadway. This will then change the scaffold plank to a surface in which your test drivers can move along safely to test chamber.
If you think your construction is ready, you can select either Test or Drive on the bottom of the screen. Selecting Test will test if your construction stays up. I won’t test it under the load of your test drivers, however, but it will show you any weak points in your construction, which will be indicated in red. You may get away with it when you select Drive and send your first test driver. If you successfully reach the test chamber, it will allow you to move on to the next level. Once you have managed to reach the exit you will unlock Convoy. This is where you can send a convoy of test subjects spaced a second or two apart from each other. Having the extra test drivers on your construction adds extra stress and if it’s too much, it will collapse.
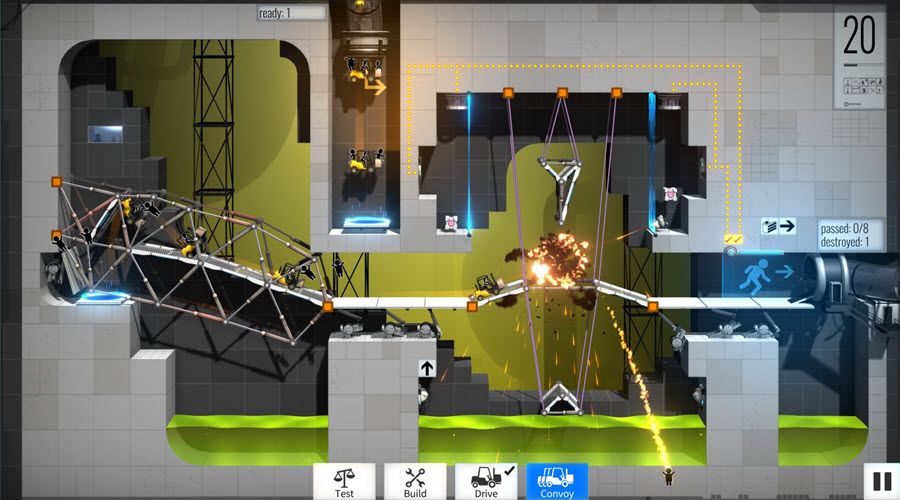
As you progress, the levels will become more and more complex, being split into various sections which are impossible to get to. To get over this you will have to deal with Aperture Science Quantum Tunnel (portals). These will allow you to move from one place to another on the level. You will still need to build roadways in order to reach the exit. You will notice that some levels have construction points in the ceiling; you can use these with the Aperture Science Multipurpose Super Cables. These cables will allow you to suspend a bridge, giving it support if there is no chance of getting any support underneath your construction.
The materials you can use are placed on the left-hand middle of the screen. On the bottom centre of the screen you’ll find Test, Build, Drive and Convoy (once a successful Drive has been performed).
You will also come across various obstacles as you try and reach the exit. These obstacles consist of Laser (in red, which will not only slice your boiled egg but will slice any poor test driver that goes through them), and Sentry Turrets (will quickly dissemble any test vehicle which is marked through the sentry turrets laser targeting area). Other times the exit doors are closed; to open them you must guide your test drivers over a Vital Apparatus Vent button on the floor. This will release Weighted Companion Cube onto a Heavy-Duty Super-Colliding Super button and thus open the exit to the test chamber.
The top left-corner of the screen is the Aperture icon, which, once selected, will open a list of options: Save, Load and Clear Construction, allowing you to either save a current construction, load an already saved construction or to clear a construction which just isn't working. Best Practises has some information which may help you proceed, and Controls is where you can check the game’s keyboard and mouse controls.
On the main menu screen is Play, Select Level, Portal Proficiency (DLC Store Page), Options, Workshop and Quit. In the option there’s Language (English, French, German, Italian, Portuguese, Russian, Chinese, Spanish, Turkish, Korean and a few others I’m not quite sure on), Resolution, FPS Limit (30Hz, 60Hz, Display- Based (1920x1080 @ 240Hz my setting) and Off), Post FX (Low, Medium and High), Antialiasing (Off, 2x, 4x and 8x MSAA), Shadows (Off, Medium and High), Full Screen (On/Off tick box). Also Music, Effects and Voices volume sliders, Cursor and Pan Speed slider, along with Delete Save Game.
Bridge Constructor Portal is a fantastic game and so far, I’ve enjoyed every minute of it. It’s easy to play but can become quite complex trying to reach the exit. This isn’t a bad thing though, as I do like a challenge and BCP certainly does that. The graphics, sounds and music are very good. I love GlaDOS and her interaction in the game. It’s a game that’s certainly worth getting - Thumb Up!!!
Review written by Piston Smashed™ for Zeepond.com!
Positives
+ Looks and sounds good+ Very enjoyable to play
+ Love GlaDOS
+ Has achievements
+ Has cards
Negatives
- Can be frustrating, but I’m nitpicking hereReview Summary
As a Test Series Tester, construct a safe passage to the Test Chamber for the Test Series Test Drivers
Share this review!
Zeepond Rating: 9/10

Video
Game Categories
All Game Reviews (1351)Hardware Reviews (0)
Action (341)
Adventure (151)
Alpha Games (2)
Anime (5)
Board Games (3)
Casual (135)
First Person (19)
First Person Shooter (30)
Hardware (0)
Horror (38)
Massive Multiplayer Online (4)
Pixel Graphics (22)
Platformer (93)
Puzzles (64)
Racing (26)
Role Playing Game (61)
Simulation (53)
Sports (20)
Strategy (246)
Third Person (11)
Utility software (1)
Virtual Reality (22)